Angular Handy code
Angular Handy Code
Following
components are involved in installing and using angular
Node,
npm(node packaging manager), ng(angular)
Node – server
(where over angular application deployed locally to run and test)
NPM –
Responsible to install angular and all other libraries, packages, and packaging
deployment jar etc.
1.
After installing node, npm
in your machine to download and install angular we need Angular CLI tool, which
will help us to create angular application
Angular CLI
(command line interface) is a tool to install which will create and run angular
application.
Below command
will install angular in your local machine. Cmd: npm -g angular@cli
2.
After installing angular we can use “ng” commands to
create angular application and adding features through terminal
- to create
new application cmd: ng new
<project name>
- to create
component cmd: ng generate component <[path]/component name> / ng g c
- to create
service cmd: ng g service <service
name>
- to create
module cmd : ng g module <module name>
In addition,
many more commands we can use… visit - https://angular.io/ for more details.
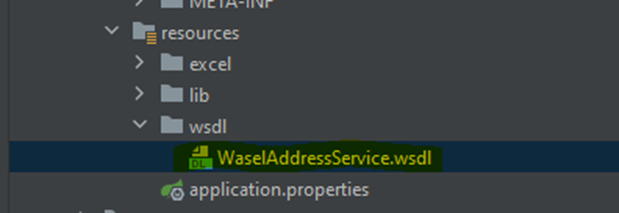
Notes: - any angular
application downloaded from internet will not have node_modules folder,
we have to install required libraries into the terminal window of application
by executing below commands, cmd: npm install, if there is a
versioning issue then execute, cmd: npm install –force
Or cmd: npm install --force / npm
install --legacy-peer-deps, cmd: npm audit fix –force
To update application angular version visit
for more details, https://update.angular.io/
Notes: - to install any
other libraries use, cmd: npm install <tool/library/software> from
terminal of the application, so that those libraries will be added to node_modules.
Let us have a look for below example: with the help of below commands, we
will install bootstrap and jquery libraries.
cmd: npm install bootstrap[version]
cmd: npm install jquery
To utilize bootstrap and JQuery features
we need to add below lines in angular.json file.
"styles": [
"node_modules/bootstrap/dist/css/bootstrap.min.css",
"src/styles.css"
],
"scripts": [
"node_modules/jquery/dist/jquery.min.js",
"node_modules/bootstrap/dist/js/bootstrap.min.js"
]
Configuration files:
1.
Angular.json
2.
Package.json
3.
Styles.css
4.
Main.ts
5.
Index.html
6.
Environment.ts
7.
App.module.ts
1.
Angular.json: - it
contains all project related settings like main folder names (src, app, etc),
here we can change the default folder names to user-define Multiple projects
under single folder, build details, configuration setting for default and
user-define and many more.
2.
Package.json: - it
contains all libraries details and their version used in application building.
3.
Styles.css: - it
will hold the global styling
4.
App.module.ts: - it
contains component declaration like all components, services, interceptors used
in application has to be declared here, it also contains imports section which
will import different modules both built-in and user define.
Notes:
- CLI commands followed by “--help“, will give you details options with that
command.
For e.g., “ng
serve --help”, “ng generate --help”
Notes:
- There is a concept of schematics, some built-in schematics are ng
add, ng update.
We can add 3rd
party library using schematics, one such is ng add @angular/material,
“angular material” is third party library that will come with many built in
features. Please google material.angular.com for more details.
Some keywords
and their implementation need to learn/practice are Data binding, property
binding, component binding, event binding, string interpolation, subject,
subscribe, subscription, promise, observable, pipe, map, tap, canActivateGuard,
ngIf, ngFor, ngStyle, ngClass
Data
Binding: - it’s a communication between typescript file(*.ts) and HTML template(*.html)
of a component like passing data. Below picture, illustrate types of
communication and method/process to communicate.

String interpolation syntax:
For e.g., in recipe-detail.component.ts
{
Recipe: Recipes;
}
And in recipe-detail.component.html
<img src="{{recipe.imagePath}}" alt="{{recipe.name}}"
class="img-responsive">
Property
Binding syntax:
For e.g., in recipe-edit.component.ts
{
1.
imagePathUrl =
recipe.imagePath;
2.
recipeEditForm: FormGroup;
}
And in recipe-edit.component.html
1.
<img [src]="imagePath.value" class="image-responsive">
2.
<form [formGroup]="recipeEditForm" (ngSubmit)="onSubmitForm()">
<button class="btn btn-success" type="submit" [disabled]="!recipeEditForm.valid">Save</button>
Notes:
- string interpolation variable is enclosed between ‘{{‘ , ‘}}’ braces
whereas property binding Variable is enclosed between double quotes(“ “)
only and property of the HTML tag/ component is enclosed between square
brackets ‘[‘ , ’]’.
Event
Binding syntax:
For e.g., in auth.component.ts
{
onSwitchMode(){
this.isLoginMode=!this.isLoginMode;
}
}
And in auth.component.html
<button class="btn btn-primary" type="button" (click)="onSwitchMode()"> switch to {{isLoginMode?
'Sign-up' : 'Login'}}</button>.
Note: in above example we can see event binding
and string interpolation on same component.
 |
| pic- forms module required for 2-way binding |
Two-way
data binding syntax:
For e.g., in servers.component.ts
{
serverName:<variable type>
}
And in servers.component.html
<input type="text" class="form-control" [(ngModel)]="serverName">
<p>{{ serverName }}</p>
For e.g., *.*.ts {
serverCreated = false;
}
<p *ngIf="serverCreated">Server was created, server name was {{serverName}}</p>
*ngIf
and else syntax:
For e.g., *.*.ts {
serverCreated = false;
}
<p *ngIf="serverCreated; else noServer">Server was created,
server name was
{{serverName}}
</p>
<ng-template #noServer>
<p>Server is not created</p>
</ng-template>
*ngFor,
ngStyle, ngClass:
<div
*ngFor="let logItem of log"
[ngStyle]="{backgroundColor:
logItem >= 5 ? 'blue' : 'transparent'}"
[ngClass]="{'white-text': logItem >= 5}">
{{ logItem }}
</div>
Note for ngClass
we have to add below lines in *.css file
color: white;
}
So far, we are dealing with passing data in a same component, if we want to communicate between different components like to pass data or to retrieve data between them we use advance features of data binding, that we are going to learn in next steps.
Note: To send data to a component or to receive data from
a component we will be using custom property and custom event binding. Refer
below pic for more details.

For receiving
input from other component, we have to use custom property binding on receiving
component template and declare variable in typescript file with @input()
descriptor before it.
For sending
output from one component to other we have to use custom even binding on
sending component template and declare and initialize method in typescript with
@output().
In below
example we included two components namely cockpit.component.ts and
server-elements.component.ts in app.component.ts
Pic-1

Notes: From pic-1, onServerAdded($event) and onBlueprintAdded($event)
are written in app.component.ts file to catch the event emitted
from cockpit component.
Explanation: here, (serverCreated)
and (blueprintCreated) is responsible to send data output by
using @output descriptor and some emitter method as shown in below image
from cockpit.component.ts and cockpit.component.html
Pic-2

onAddServer(serverNameInput) and onAddBlueprint(serverNameInput)
click listener we are emitting output from component typescript file as shown
below:

From pic-1
<app-server-elements [srvElement]="serverElement"></app-server-elements>
[srvElement] is declared with @Input() descriptor to
receive an input
Note: we will create services, models as re-usable
components. Services mainly contain reusable methods, helps to communicate
between components and model contains the data structure. We can use “ng
generate service <service name>” and “ng generate model <model
name>” commands in terminal to create service and model.
Services:
- it contains re-usable methods/functions, helps in effectively
communicating between components.
“ng generate service <service name>”
We can
generate service using above command; services
can be available only to the components declared in a same hierarchy,
if we need services to be available across the application we have to include
it into root module (app.module.ts).
Sample
Service files for your reference:

In above pic
we have RecipesService and ShoppingService. Later service is injected into
former service with the help of @Injectable Meta
data, providedIn: ‘root’ means both
services are injected in (app.module.ts).
Once service
is created, we have to inject it, which means providing service at component,
sub-component hierarchy and application.
If you want
service to be available in a component we have to inject service name in a provider decorator of that component, for e.g.,

If service is
injected in (app.module.ts) then it is available to all components and we do not
have to add providers’ decorator in component, we can simply use service by
declaring in constructor.
Communication
between components using services:
We will be
using subject, observer, promise, pipe, ES-6
function format, emit, subscribe, subscription
terminologies.
There are
2-ways through which we can create form in angular. Template driven and
Reactive form.
1.
Template
Drive(TD) Form:
In Template
Driven form creation we will create template <component-name>.html file
first with fields required, add directives to the HTML tags as required then we
will create respective form <component-name>.ts file.
For example:

1. To
use TD form directives in component, we have to import “FormsModule” in “app.module.ts” file.
2. When
we create TD form we have to give the form name prefix with “#”, so that it can be accessible in
*.ts file. See FYR, #empForm ="ngForm"
3. To
refer template field in *.ts, we have to add ngModel directive with name attribute mandatory. See FYR, ngModel name="firstName"
4. If
your form has multi-level and you want to group them as parent and child then
use ngModelGroup directive. See FYR, ngModelGroup="address"
5. To
submit whole form on a button, type submit
we can use ngSubmit listener and
call method with and without argument. See FYR, type="submit">Submit</button>
(ngSubmit)="onSubmit(empForm)" and (ngSubmit)="onSubmitViewChild()"
See below
implementation of ngSubmit in *.ts
file, FYR,

1.
Reactive
Driven(RD) Form:
In Reactive
Driven form creation in <component-name>.ts we will create a form with
required form type and attributes and then link the form to template <component-name>.html
file, add directives to the HTML tags as required.

Points to
remember:-
1. To
use RD form directives in component, we have to import “ReactiveFormsModule” in “app.module.ts” file.
2. To
create a form in *.ts, create a form with “FormGroup” type,
See FYR, employeeForm: FormGroup;
3. To create nested form, see 'address':new FormGroup({
4. For fields we have to
create them as “FormControl”
See FYR, 'firstName':new FormControl(
5. To
link form created in *.ts file with *.html we have to add “FormGroup” directive
6. To
link field we have to use “FormControlName” as shown in below
image.
7. For
nested form like parent child, use “FormGroupName” as shown in below
image.

Different
way of declaring variables
1.
In below syntax we are declaring variable serverElements
is an array of some object type and initializing it at the same time.

2.
serverNameInput is field name, can
be used in template as shown in button tag or for validation and accessing the
field in template and in typescript. To use in typescript we have to declare
variable with @viewChild() decorator as shown below.


Comments
Post a Comment